One of the coolest features of the Fujifilm X Series cameras is their film simulations and the ability to program recipes directly into your camera. But if you’re new to Fujifilm or the XT50, it can be a bit confusing figuring out how to navigate it.
In this post, I’ll show you three different ways to access film simulations on the Fujifilm XT50, how to customize them to match your creative style, and how to save your recipes as custom settings on your camera. I’ll also share a few recipes I’ve experimented with at the end!
Disclosure: This post may contain affiliate links. If you make a purchase through them, I may earn a small commission at no extra cost to you.
Fujfilm XT50 Film Simulations & Recipes
What Are Film Simulations?
If you’re new to the film simulation game, film simulations are basically digital recreations of Fujifilm’s classic film stocks. In theory, they let you replicate the look of film without the hassle of shooting film.
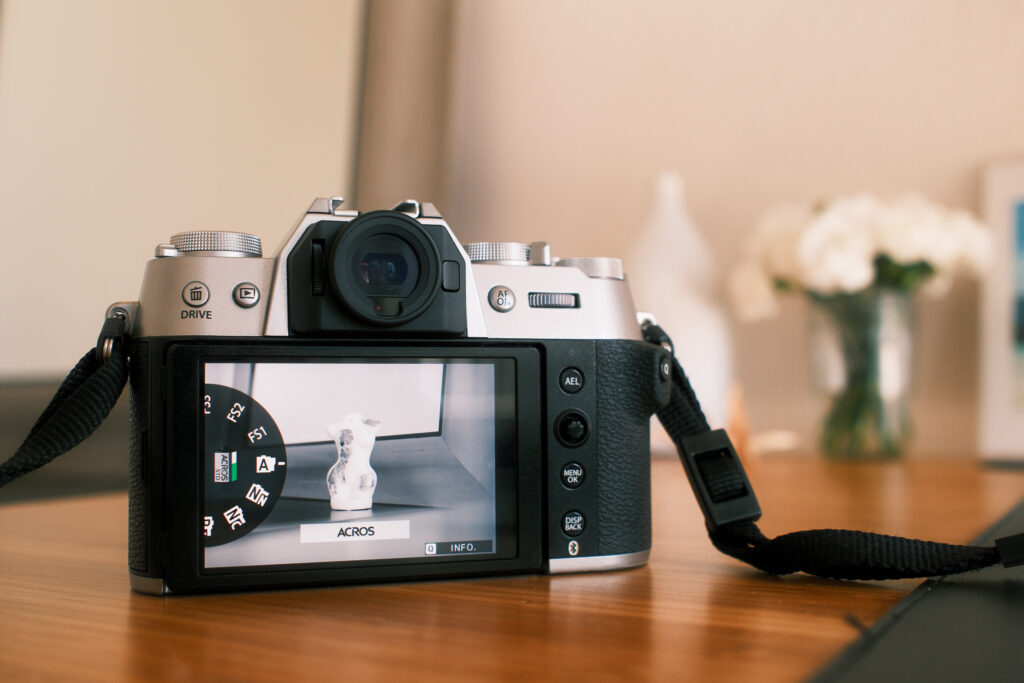
The Fujifilm XT50 comes with 20 film simulations built into the camera. It may initially appear like there are only 14, but additional variations are available for both Acros and Monochrome.
Overall, Fujifilm cameras have incredible color science. Photos look great straight out of the camera, which means less time editing (my least favorite thing to do).
However, if you’re coming from editing RAW files in Lightroom, film simulations can feel very subtle. So I highly recommend spending time getting to know each simulation to see which ones you like best and in which situations.
Recommended read: Why I Got a Fujifilm XT50 (and not an XT5)
How to Access Film Simulations
The Fujifilm XT50 was the first X Series camera released with a dedicated film simulation dial, which sparked a lot of discussion among longtime Fujifilm users.
When I first got my XT50, I was stoked to have a dial to switch between film simulations easily. But it didn’t take long for me to realize that it’s kind of redundant.
Below are three ways you can access film simulations on your Fujifilm XT50.
1. Using the Film Simulation Dial
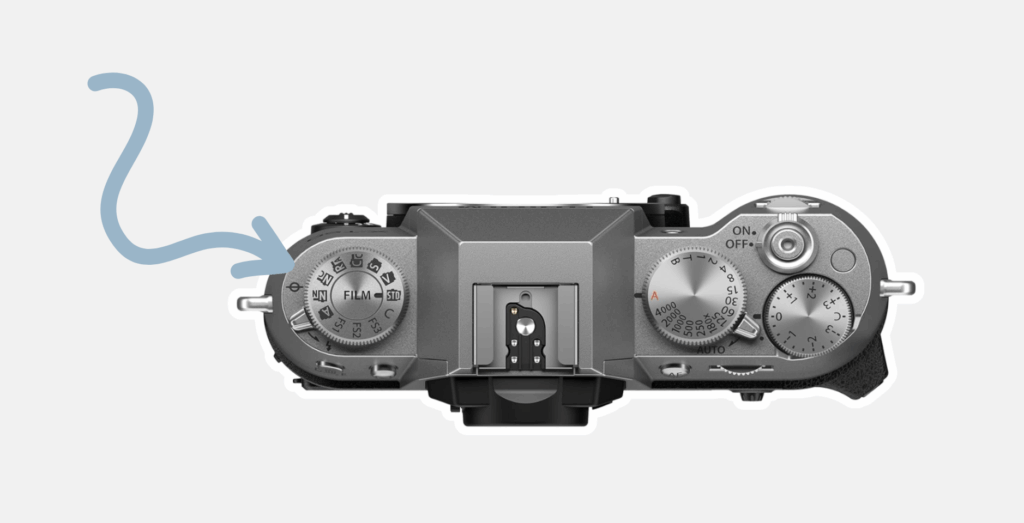
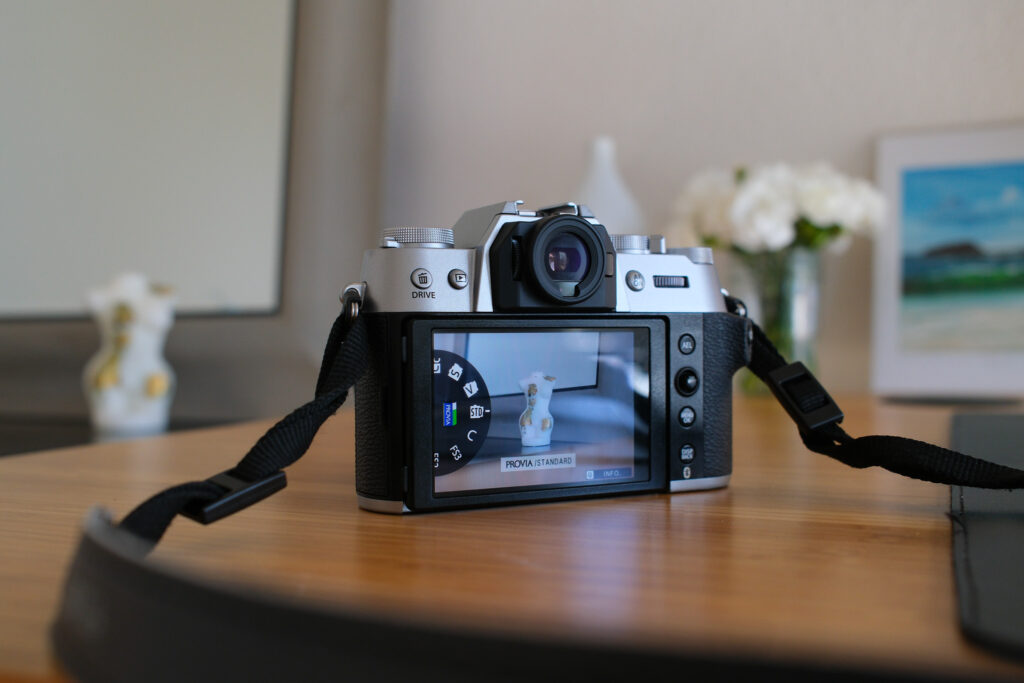
The most obvious way to access film simulations on the Fujifilm XT50 is through the dial on top of the camera. However, this dial only displays 11 film simulation options — 8 built-in simulations and 3 customizable spots (FS1–FS3).
You can use the dial in any shooting mode (Auto, Aperture Priority, Shutter Priority, or Manual). Simply rotate the dial and select a film simulation.
The best part of using this? You can preview each film simulation live on your screen as you turn the dial.
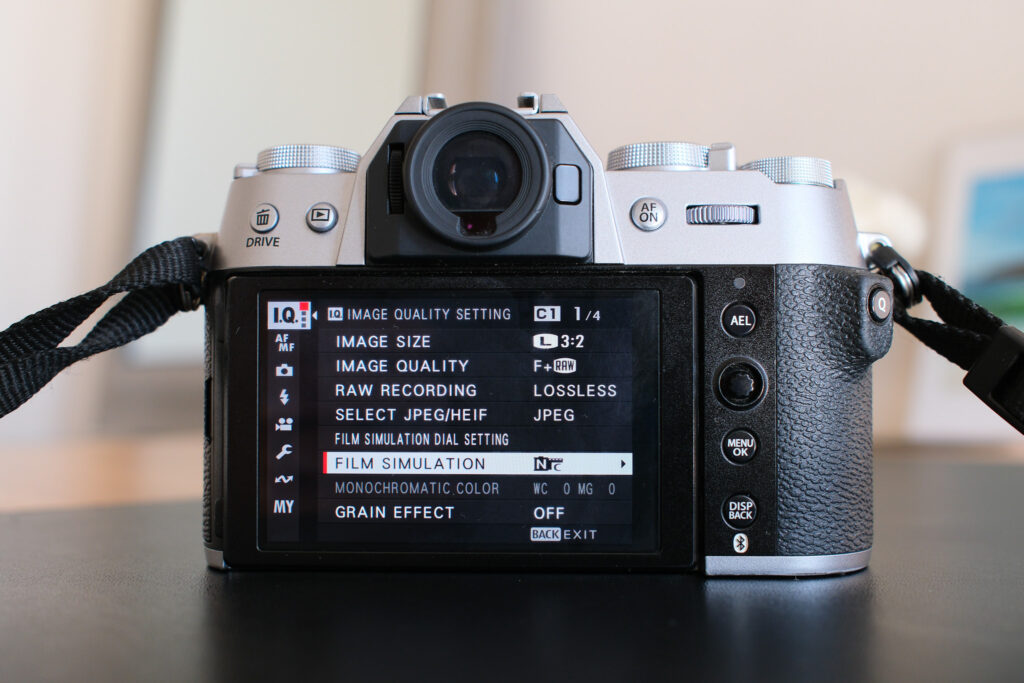
2. Using the I.Q. Menu
You can also access all 20 film simulations through the Menu.
To change your film simulations without using the dial, you’ll need to turn the Film Simulation Dial to C (which stands for Custom or Command). If the dial is set to anything else, like Provia Standard or Acros, your camera will remain stuck in that specific film simulation.
To do this:
- Turn your Film Simulation Dial to C.
- Open your Menu.
- Go to the first page of your Image Quality (I.Q.) menu.
- Select Film Simulation and scroll through all 20 options.
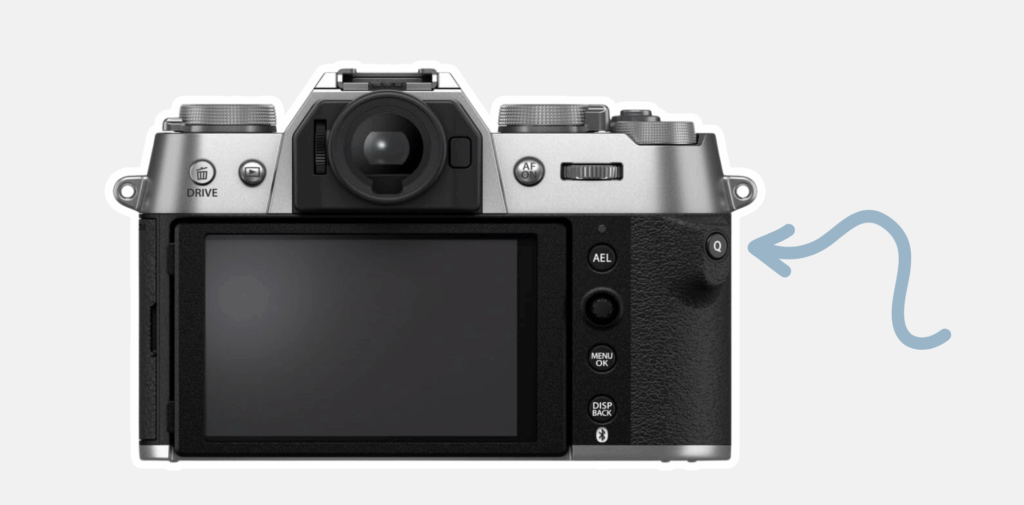
3. Using the Q Menu
My favorite way to access film simulations that are not on the dial is through the Quick Menu (Q).
Here’s one way to add film simulations to the Fujifilm Q menu:
- Turn your Film Simulation Dial to C.
- Go to Menu → Set Up → Button/Dial Setting → Edit/Save Quick Menu.
- Choose how many slots you want.
- Select one of the boxes → choose Film Simulation → save.
Now, when you press Q, you can scroll through your film simulations using the back command dial.
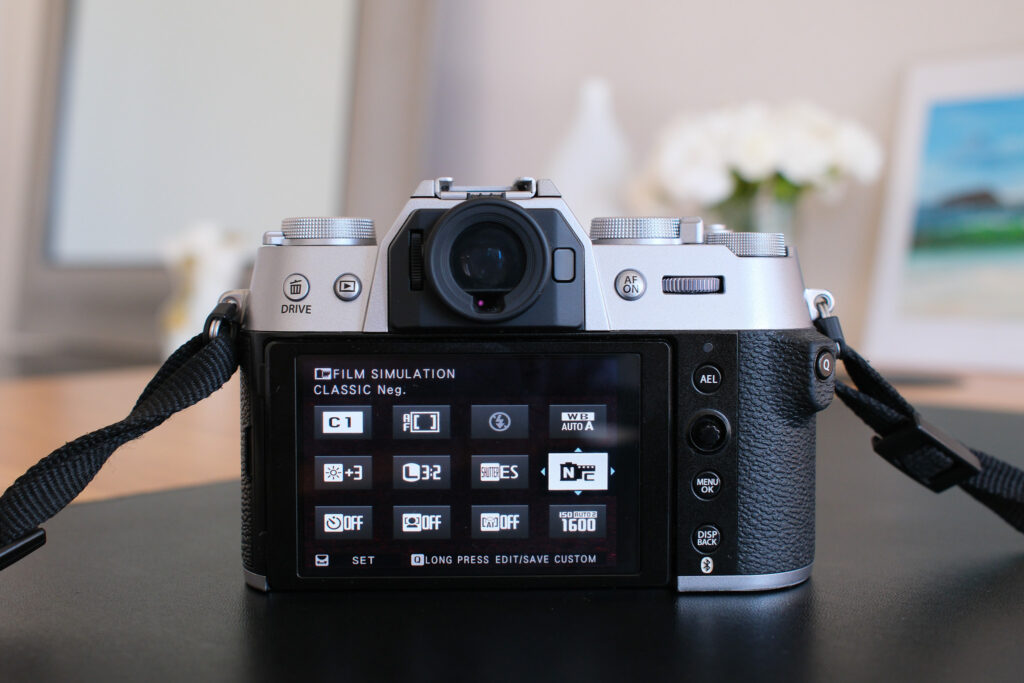

How to Adjust Film Simulations
Once you’ve selected a film simulation, you can tweak its look in the I.Q. Menu, but this only works outside of Auto mode.
Here’s how to do it:
- Open the Menu → go to the I.Q. Menu.
- You’ll see a list of adjustable settings beneath “Film Simulation,” such as:
- Grain Effect
- Color Chrome Effect
- Dynamic Range
- Tone Curve
- Color
- Sharpness
- Clarity
- White Balance

Your camera defaults to “0” or “Auto” for these settings. Once you make changes, they’ll stay that way until you reset them. If you experiment and don’t love the results, just set everything back to 0 or Auto.
Adjusting film simulations like this is the foundation for creating film recipes, which you’ve probably seen all over the internet.
Recommended read: How the Fujifilm X-T50 has changed my photography
How to Add & Save Recipes on the XT50
As you’ve probably figured out, film recipes are custom versions of film simulations.
You start with a base simulation (like Classic Chrome), then fine-tune settings like grain, color, clarity, white balance, and more to create a unique look.
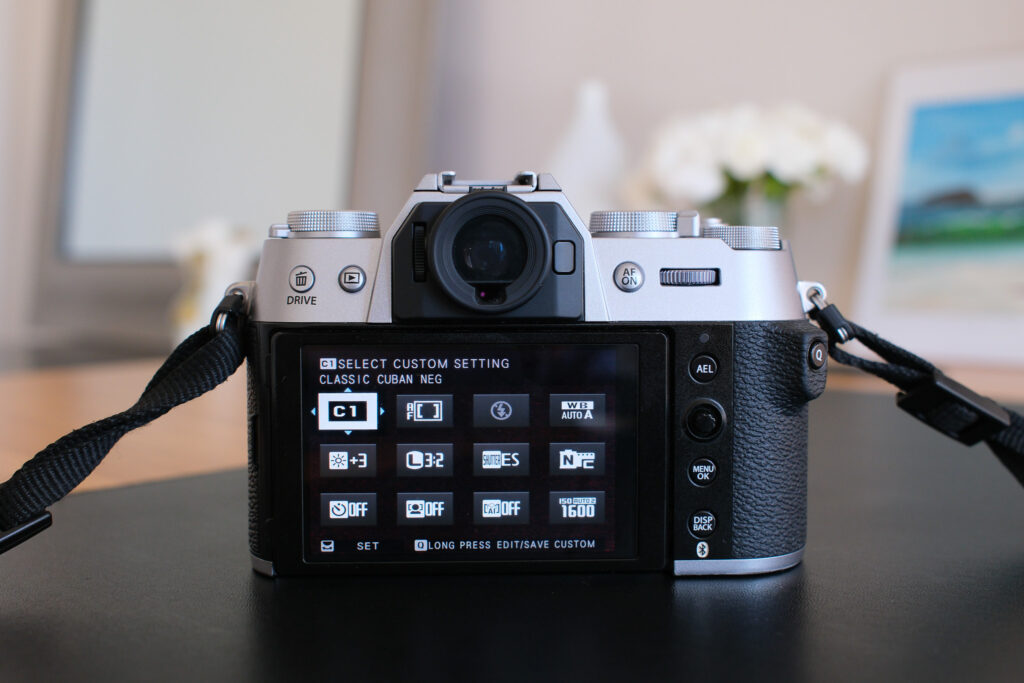
Your Fujifilm XT50 has seven custom slots (C1–C7) for saving film recipes.
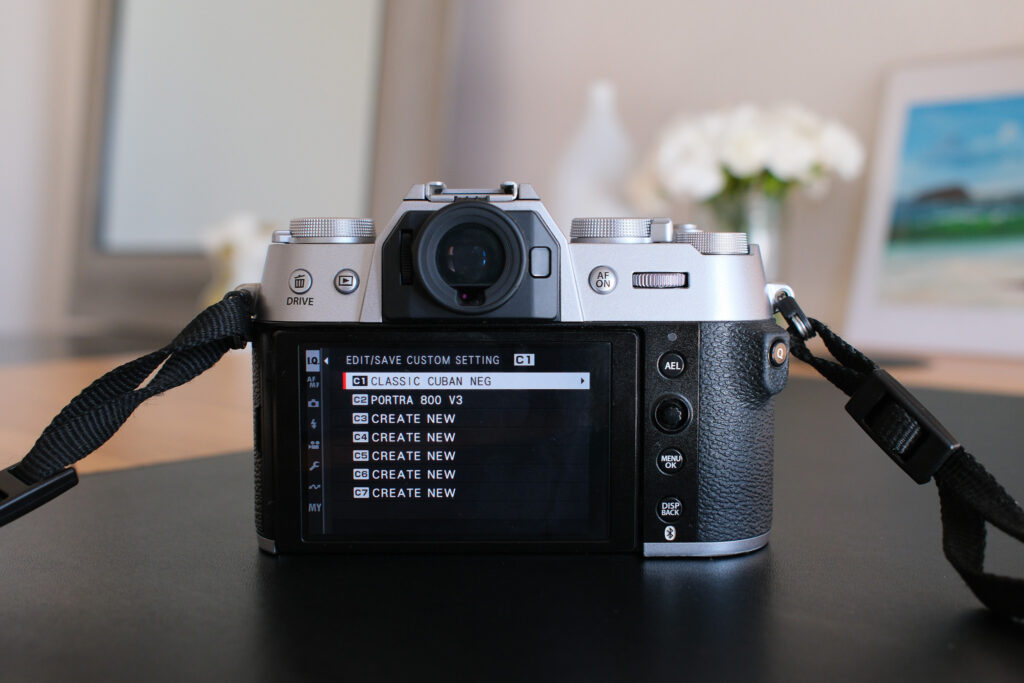
Here’s how to create your own or add a recipe:
- Go to the I.Q. menu.
- Select Edit/Save Custom Setting (page 4).
- Choose a slot (C1–C7).
- Select Edit/Check.
- Choose Image Size/Image Quality (I use 3:2 / Fine + RAW).
- Pick your base Film Simulation.
- Adjust settings like:
- Grain Effect
- Color Chrome Effect
- White Balance
- Tone Curve
- Sharpness
- Clarity
- Press Q to save.
- Name your recipe (for example, “Classic Cuban Negative”).
- Access it anytime through your Q Menu by scrolling through your custom slots.
To add someone else’s Fujifilm recipe, follow the same steps above, adjusting each setting to match the shared recipe. Once saved, you can easily access it from your custom slots or Q Menu whenever you want to shoot with that look.
Recommended read: Fujifilm XT50: Common Problems and Simple Solutions
Film Recipes I’ve tried and liked
I’ve had a Fujifilm camera for nearly 9 months and haven’t really experimented with too many film recipes.
After 10 years of editing RAW files in Lightroom (and using Adobe Camera Raw before that), it’s been a hard habit to break.
But since getting the XT50, I have been editing more JPEGs, and when I use a film recipe, I try to only make small adjustments (like spot removal or subtle color tweaks).
And it’s a much quicker process overall.
Here are three recipes I have tried:
1. 1970s Summer by Fuji X Weekly
On a bright, sunshiny day, once I finally felt somewhat comfortable with my XT50, I decided to try my very first Fujifilm recipe. And it was this one! I haven’t used it since, but looking back at these photos is definitely making me want to.
If you’re new to Fujifilm recipes, I highly recommend checking out Fuji X Weekly’s website and app. It’s a goldmine for Fujifilm film recipes.
You can find the pictures below + two more from this outing on my Instagram here.


2. Classic Cuban Negative by Osan
The Classic Cuban Negative recipe seems to be a cult favorite. When I was looking for film recipes, it kept popping up as a top rec on Reddit forums and social media.
This recipe uses auto white balance, so I decided to give it a try over my graduation weekend in Providence when the weather wasn’t great. Like with most other film simulations, my personal editing style feels very different from this recipe, but I loved seeing how it influenced my images.
You can see more images from my graduation weekend on my Instagram here.


3. Portra 800 v3 by Fuji X Weekly
I absolutely love this film recipe and have been using it nonstop. Even though it doesn’t really match my old editing style, I am having a ton of fun with it.
But I must admit… I might be getting a little ahead of myself… because I have only tried it on my new x100vi, not the XT50. But it should work the same!
All of the images in the carousel below were taken with Porta 800 v3 on a x100vi.
Update: It does work the same! All of the images in the carousel below were taken with this recipe on my XT50.
Recommended read: I Love the Fujifilm XT50 — But These Things Frustrate Me
Random Q&A
1. Can film simulations and recipes replace editing?
It depends. Many Fujifilm shooters love the straight-out-of-camera (SOOC) JPEGs and skip editing altogether. Personally, I still make small adjustments to most of my images… old habits die hard.
2. Do film simulations and film recipes apply to RAW files?
No, film simulations and recipes only apply to JPEGs. Your RAW file remains unaltered.
3. Does the Fujifilm XT50 film simulation dial change any other settings besides the film simulation?
No, the film simulation dial on the Fujifilm XT50 only changes the film simulation. It does not change additional settings like grain, contrast, color, or tone curve.
Those other adjustments stay the same across the dial positions and can only be changed through the I.Q. menu, Q menu, or within your custom settings (C1–C7).
Some see this as a bit of a drawback. But once you set up your favorite recipes in the custom slots, you can easily access all those tailored adjustments.
4. How many film recipes can I save on the Fujifilm XT50?
At the time of writing this, the Fujifilm XT50 has seven custom setting slots.
Final Thoughts
The Fujifilm XT50’s film simulations and recipes are such a joy to experiment with.
The X Series cameras produce incredible images straight out of the camera, which is great if you’re like me and don’t love spending hours editing!
If you’re new-ish to photography and stuck shooting on automatic mode, check out my self-paced 7-step program below!